Frozen Pipes: What to Do and When to Call ONit Building Services
When to pay a pro comes down to risk, cost and time. Obvious indications are safety issues, complex systems and warranty requirements. Live wiring, gas lines or structural cracks require licensed assistance. Chronic leaks, mould larger than 1 m², or software hacks with compromised data also need professional help. When jobs require licensed tools, compliance with regulations or warranties, professional assistance is more cost-effective than repeated repairs.
How to decide, measure scope, skills and urgency, and proceed carefully.
Identifying Frozen Pipes
Frozen pipes bring a home to a standstill and can fail rapidly. Be aware of the symptoms, inspect the usual problem areas, and monitor what you discover. Pipes can freeze if the temperature drops below 0°C, sometimes in just six hours, particularly in unheated voids or where pipes lack lagging.
- No Water
No water coming from a tap, or just a thin dribble, is the most obvious indication that ice is obstructing the pipe. Start with a kitchen tap, then a bathroom tap on a higher floor. If one room flows and another doesn’t, then the freeze is local.
Don’t forget to check both hot and cold at each basin or sink. If cold is okay but hot isn’t, the freeze could be close to the hot-water outlet or in a feed to the cylinder. If both are weak throughout several rooms, suspect a main run in the loft, garage or an external wall.
Check the stop tap is open. Check your water company’s outage alerts if you think it’s a bigger supply issue. Keep a simple log: which fixtures fail, time of day, indoor temperature, and any changes. This will save time if you call a pro.
Prior to any thaw attempt, turn off the mains at the stop-valve and open the closest taps to relieve pressure. A pipe won’t necessarily burst if detected early and thawed gently.
2. Strange Noises
Hollow knocking, banging, or gurgles indicate ice and trapped air. You may notice a brief rattle when a tap is started, then a drop out as flow ceases. That is usually a partially frozen section coming back to life.
Note when the noise starts, which tap triggers it, and how long it lasts. A short clip on your phone helps a plumber judge the risk. Do not wrench a stiff tap or valve because force can crack a stressed joint.
3. Visible Frost
Inspect exposed pipework in lofts and eaves, garages, under floors, and next to outside walls. White rime, a milky frost sheen or tiny droplets of moisture on a short run often signal the frozen location. Feel for one section that is significantly colder than the others.
Use a surface thermometer if you have one. It takes readings in sub-0°C and reports what you see. Take a photo of the frost and the area around it, including missing insulation or gaps around vents. Typical culprits are unlagged pipes, an uninsulated loft, heating switched off while you're away, and forgotten outdoor taps.
4. Damp Patches
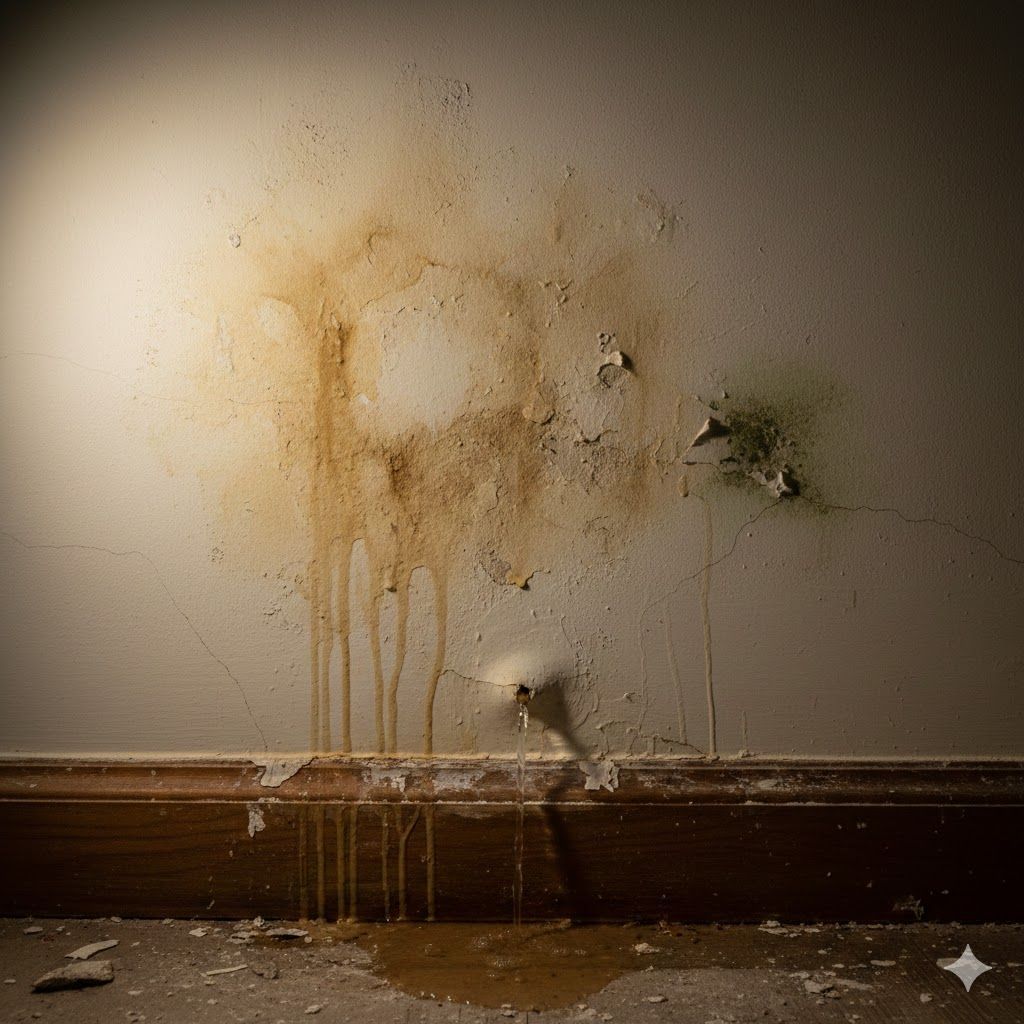
Damp circles on ceilings or walls close to pipe runs can be a rupture following a freeze. Puddles, tide marks or fresh mould indicate water has leaked past failed insulation.
Inspect cupboards, behind the washing machine, and basement pipes. Outdoors, inspect hose bibs and exposed spurs. Note each affected spot and shift items under threat.
If the pipe expanded too much, it may have burst and will need repair.
When to Call a Professional Emergency Plumbers
When to Call a Professional If there’s any danger of gas or electricity leaks, structural collapse or contamination, get back. When in doubt, it is better to be safe than sorry and ask for help.
1. The Leak Is Uncontrollable
If water is gushing, pooling quickly or flooding down from ceilings, you should treat it as urgent. Turn off the main water valve, open cold taps to drain, move valuables and call a licensed plumber. Forget duct tape, sealants or towels. They cover symptoms and can force water into walls and floors. Take pictures and log times and rooms affected for insurers.
If electrics are near water, switch off power at the consumer unit and stay away. Safety first, repair second.
2. You Cannot Locate the Freeze
When pipes freeze and you can’t find the cold spot, a pro can locate it without guesswork. Concealed runs in walls or beneath floors require thermal imaging or acoustic instruments. Never open up walls or ceilings on a hunch. That can make a simple repair a huge job. Write a list: which taps stopped, odd noises, time of day, rooms colder than others. This assists the pro in tracing the line quickly and keeps costs down.
3. The Pipe Has Already Burst
When to call a plumber Switch off the internal stop tap, drain the system and keep clear of electrical equipment in damp areas due to fire risk. Call a professional immediately. Water under floors can rot joists and attract spreading mould. Photograph and briefly note any damage, including meter readings if you can. If anyone is injured or the property is unsafe, call for emergency assistance. For life-threatening medical or mental health emergencies, call 999 or attend A&E. For non-emergencies, call 111 for advice.
4. You Lack the Correct Tools
Some jobs demand specialist kit: pipe thawing machines, pressure testers, CCTV drain cameras, or safe gas detection. Improvised tools are risky and lead to cracks, cross-threads, and leaks. Professionals come armed with the right gear and the ability to put it to good use right away. Make a list of required tools. If you don’t have critical equipment or training, seek assistance rather than making it worse.
5. Your DIY Efforts Have Failed
Stop if your fix doesn’t hold or it produces new problems. Persistent leaks, sluggish drains that return, or recurring freezing suggest more profound issues such as sewer line fractures or broken insulation.
DIY-ing can invalidate warranties or insurance policies. Provide a quick timeline of what you’ve attempted, the products involved, and where the water went; this speeds diagnosis. For gas smells, suspected asbestos or shocks, call in the professionals immediately. Even for DIY jobs that look easy, such as wallpapering or painting, if you’re unsure about surface preparation or safety at height, hire a professional. If you’re feeling unsafe, overwhelmed, or upset, get help. In a crisis or if you have suicidal thoughts, call 999 or A&E. For unsure health issues, call 111.
DIY vs Professional: When to Call
| Scenario | DIY OK | Professional Needed | Why |
|---|---|---|---|
| Dripping tap | Yes | If leak persists | Risk of hidden valve damage |
| Gushing leak | No | Yes | Safety, structural risk |
| Frozen pipe (visible) | Maybe | If location unknown | Prevent wall damage |
| Burst pipe | No | Yes | Emergency, electrics risk |
| Gas smell | No | Yes | Explosion hazard |
| Suspected asbestos | No | Yes | Health Hazard |
The Hidden Dangers of DIY
DIY seems clever and cost effective. It can be risky. Shoddy tools, guesswork, and poor emergency ‘fixes’ can ignite fires, flood rooms, and injure you. It can violate building codes, nullify insurance, and compromise a house’s structural integrity. One miscalculation can result in thousands of pounds worth of damage or leave behind toxic mould that can take years to resolve. Some things are best left to licensed pros!
- High-risk tasks to leave to qualified trades: * Live electrical work, consumer unit changes or rewiring.
- Gas line work, boiler service, flue changes.
- Primary plumbing stack, pressurised systems, or hot water cylinders.
- Waterproofing pours, roof membranes, or structural changes.
- Anything requiring permits, inspection, or certification.
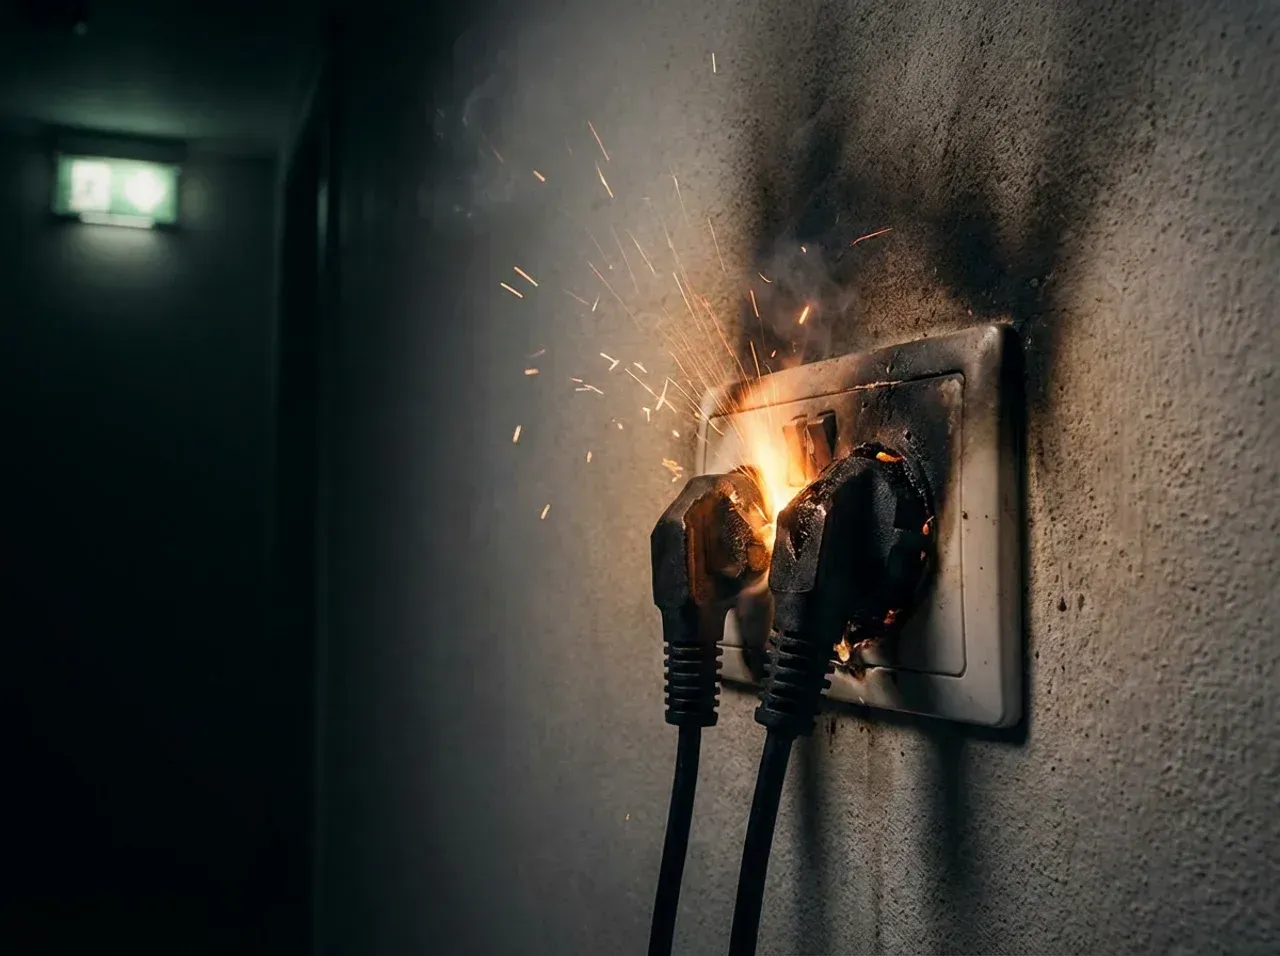
Fire Hazards
Heat and pipes are dangerous. Blowtorches can set framing, dust or pipe wrap alight in an instant. Even hairdryers can scorch if you leave them in one place. A tiny flare in an enclosed space can go up before you even glimpse it. Not all YouTube tutorials reveal the hidden hazards.
Clear thaw zone. Keep cardboard, solvents, cloths and insulation away from heaters. Protect surrounding wood with a fireproof screen if a professional can’t do without heat.
Faulty wiring causes fires and shocks. Any wiring supplying pumps, heaters or tools should be checked and installed by a qualified electrician. DIY repairs on appliances come with electrical shock risk if wiring is faulty, and that same fault can smoulder away in walls.
If gas is involved, fit carbon monoxide detectors on every storey and close to sleeping areas. Don’t forget to test them regularly. A DIY repair might appear fine initially, but issues can emerge later when nobody’s looking.
Water Damage
Incorrectthawing will crack pipes, and a hairline fracture is capable of causing litres to leak quickly. A botched repair or an over-tightened fitting can easily cause concealed leaks that waste gallons of water each day and send your utility bills skywards Water slithers. It destroys joists, expands floors, and promotes wood rot. Even slow leaks can leave you with thousands of pounds worth of hidden damage.
Missed drips lead to mould. That causes health problems and protracted, expensive treatment. Not every DIY fix is as easy as the how-tos make out, and little mistakes multiply.
Personal Injury
Working around water and power leads to slips and shocks. Tools leap when hands are wet. Trips occur in messy rooms.
You are then rifling through tight lofts and crawl spaces, straining backs and knees. Without knee pads, an eye mask and good light, little errors pile on.
Mould, sewage, or grey water is full of nasty bugs. Breathing that air can cause asthma and infections.
Essential PPE:
- Safety glasses, cut‑resistant gloves, and knee pads
- Non‑slip boots and a hard hat for overhead work
- FFP2/FFP3 mask for dust and mould
- Hearing protection and a head torch
- GFCI/RCD‑protected extension lead
-
DIY ‘plumbing’ errors, such as not sealing properly or overtightening, can later let you down. Only time tells on quality and longevity, and the repair often is more expensive than a pro would have charged up front. If in doubt, homeowners should put safety first and call in the pros.
Beyond the Thaw: Assessing the Aftermath
After pipes thaw, the work isn’t over. Beyond the Thaw” is the era when buried cracks emerge. It’s so similar to how these bigger thaws are transforming land, water, and everyday life. The same idea scales down at home: you inspect systems, track changes, and act fast to prevent slow damage.
Checking for Leaks
So start with a slow, steady action. Run the water at a low flow, then at normal. Check every joint, valve, elbow and union you can see. Touch pipes with a dry finger. Cool mist or droplets equal a bad sign. Little leaks can be concealed behind cupboards or near outside walls where the freeze was worst.
Use tissue or paper towels to catch fine drips. Wipe along seams and threads. If the paper blots, you have a pinhole or a loose fitting. Lay a dry sheet under traps and mixers and check again in 10 minutes.
Scan below sinks, behind washing machines and dishwashers, and pipe runs that go through unheated areas. Seek out damp streaks on plaster, warped kickboards, or a musty smell. Keep a register of each one you discover.
Record leak locations and drip rate. A drip gets priority over a sweat. Time-stamp notes with room names, pipe size if known, and photographs for briefing a plumber.
Monitoring Water Pressure
Test pressure at several taps: kitchen, bath, utility, garden. Confirm both hot and cold. If one area is behind, it could be a local bog or a kink following a freeze shift.
A constant sag may suggest a partial ice crush or debris in the line. Upstairs and downstairs. Uneven flow indicates pipe damage, not a basic aerator blockage.
Tool up with a pressure gauge for black and white digits. Fit it on an outside bib or laundry tap. Note readings before and after thaw if you had them. If not, set the baseline now.
Track results for 3-5 days. Stable numbers suggest the system has ‘landed’. A slow bleed may even indicate an unseen leak in a wall or under a slab, requiring a visit from the professionals.
Inspecting for Damage
Check walls, ceilings and floors near pipe runs. Stains, hairline cracks and softening areas suggest previous or ongoing ingress. Discolouration that expands or darkens indicates active moisture rather than old marks.
Check insulation and pipe lagging. Wet fibre loses its R-value and can become mouldy. Replace droopy wraps. Dry and wash the area first. Well insulated means less chance of freeze later.
Review structural parts near affected pipes: joists, sill plates, and stud bases. Worm a screwdriver into the wood. If it sinks, it may be soft or rotten. In cold habitats, thaw can cause small-scale movements such as heave. It is on a landscape scale that thaws undermine land use and increase floods and landslides.
Organise findings for repairs and claims:
- Room/area and surface (wall, ceiling, floor)
- Type of damage (stain, crack, bulge, mould)
- Size and spread (cm, change over time)
- Suspected cause and nearby pipe route
- Photos, dates, and pressure readings
Thaw events, from homes to permafrost, reshape systems. Assessing the aftermath needs a joined-up view: environment, people, and engineering. Research shows shifts in water resources and services. At scale, thaw releases carbon and raises risks. Communities adapt by checking, recording, and fixing early. At home, you do the same.
Preventing Future Freezes
Focus on two fronts: hardware and human habits. Pipework and gas lines should be insulated against freezing temperatures. Develop simple practices to ground yourself as stress escalates. Both mitigate risk, costs and the need for emergency call-outs.
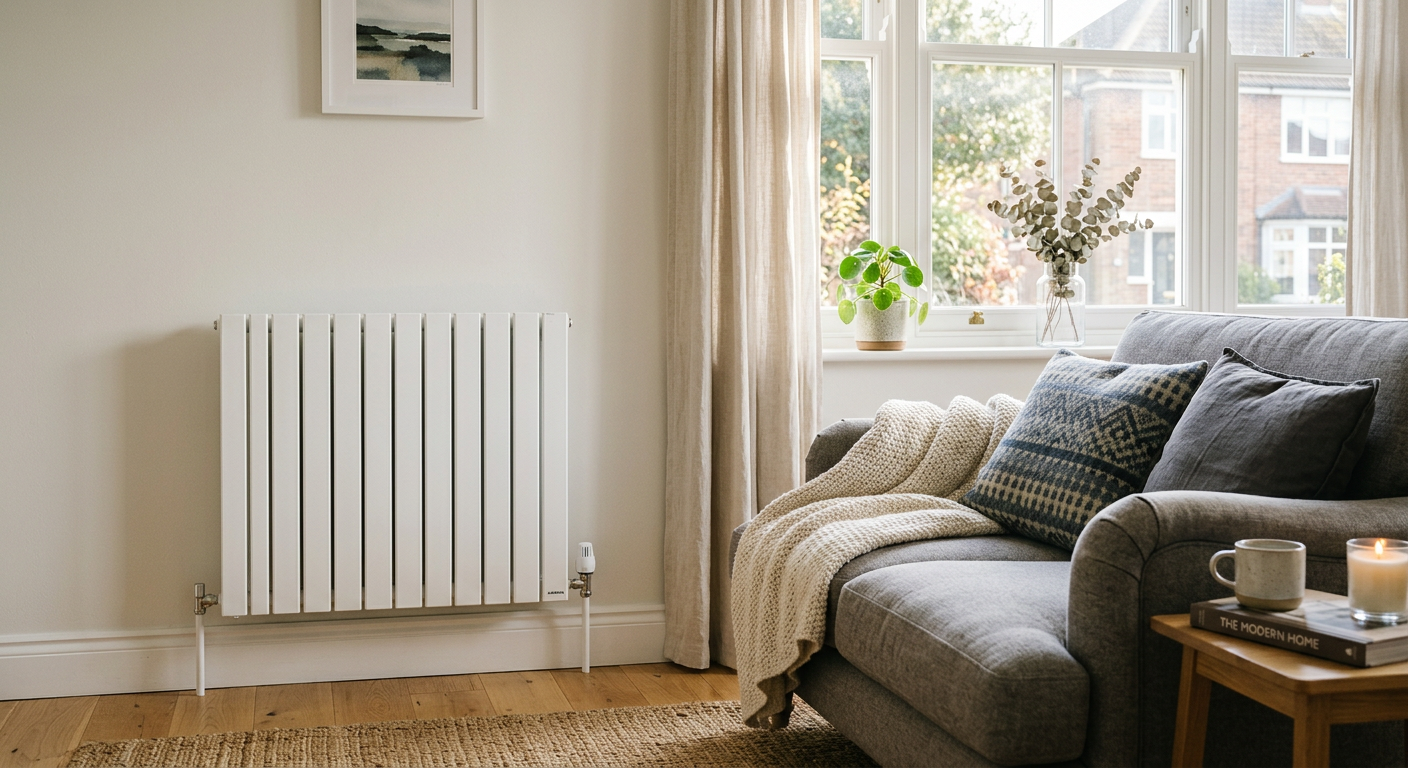
Pipe Insulation
The insulated sleeves will help by holding heat, particularly on pipes in lofts, garages, crawl spaces and exterior walls. Pipe insulation in the colder zones minimizes the risk of freezing in cold weather and hot pipes remain efficient.
In more extreme climates or outdoor runs, install heating tape or self-regulating heating strips with built-in thermostats. To do this, check local safety regulations and only choose products rated for your type of pipe—copper, PEX or PVC—and for wet or dry locations. Cover joints, tees and bends, as these cold spots start the freeze first. For quick choices, use closed-cell foam for indoor copper, rubber insulation for high-traffic zones, UV-stable sleeves for outdoor lines, and thermostat-controlled tape for exposed sections near vents or eaves. Fit additional pipe clips to prevent sag exposing gaps.
Sealing Draughts
Block cold inflow at the points it loves: door bottoms, window frames, and where pipes pierce walls. Stick weatherstripping on frames, a draught excluder beneath doors, and expanding foam around pipe entry points to prevent wind from cooling the pipe surface.
Inspection Walk the loft, basement and garage with a torch on a cold day and feel for draughts by hand or listen for whistling around gaps. Keep track of every sealed location in an easy record with photos and dates. This handy little log helps you keep track of what was done, what broke, and what needs a revisit before winter.
Regular Maintenance
Schedule a yearly plumbing and gas line inspection prior to winter. A certified inspection finds sluggish leaks, inadequate insulation, and symptoms of frozen gas line problems such as sputtering appliances, weak flame, or repeated turn-offs so you can intervene earlier and safely. If you gas, add moisture control at the meter and low spots since water in lines is an inevitable freeze culprit.
Flush pipes to remove sediment that slows flow and cools water, and replace worn washers, valves, and seals that leak and invite ice. Maintain a calendar with dates, tasks completed, and due dates. Monitor your own stress indicators as well. Stress can cause you to freeze up in a crisis. Notice body cues—tight jaw, shallow breath, odd sounds in the room—and choose a response: step back, act fast, or call for help. Avoid “future tripping.” Stay present, leave the ego at the door, save energy, and trust the process. These wee habits make you steadier when pipes require steady hands.
The True Cost of Delay
Delays make minor faults into major bills. They stack risks you cannot see at first: hidden damage, health issues, and even higher insurance costs. Delay can easily be measured in monetary terms. In product work, teams use cost of delay to prioritise what to fix first. The same logic works at home. Think in three parts: User Business Value (comfort, safety, resale), Time Criticality (how fast harm grows), and Risk Reduction or Opportunity Enablement (stopping future loss, unlocking savings). Most teams (approximately 85%) don’t know what a few months delay would cost. Do the calculations. A 13-month delay equals about $97,500 in lost earnings. Choose the quickest, top-value jobs first using WSJF, which is Cost of Delay divided by Job Duration.
Immediate vs delayed repair cost comparison (illustrative, per incident, in $):
- Leaking pipe fix now: 180 to 350. After delay with ceiling repair, mould: 2,000 to 6,000.
- Water heater valve now: 90 to 150. After delay, tank failure and flooring costs range from 1,500 to 4,500.
- Roof flashing now: 120–250. After delay, rot, repaint, insulation: 1,800–5,000.
Structural Damage
Seek out cracks that widen, doors that catch, ceilings that bow, floors that cup or slope, and skirting boards that detach from walls. Water finds joints, swells timber, rusts rebar and weakens fixings. If you notice damp lines on plaster or a ridge along a floorboard, suspect water. Probe with a moisture meter if you have one.
Weeks-long drips can overload a beam beyond its safe span. Plasterboard sags, joists twist, and the bearing at brick pockets crumbles. Once rot sets in, replacement isn’t a choice; it’s the only safe route. A plumber’s first time out can cost less than £300. A later structural job can run into multiple thousands and potentially require permits and surveys. Call early to avoid permanent damage.
Mould Growth
Musty air remaining post-clean, tiny black spots around grout lines, fuzzy grey or green patches in chilly corners or blistered paint all indicate mould. It flourishes where leaks leave surfaces moist, behind wardrobes pushed to chilly walls and beneath sinks where drips remain undetected.
Health risks are real. They complain of coughs, wheeze, sore eyes and rashes. Asthmatics or immunocompromised people can deteriorate rapidly. List every spot: bathrooms, kitchen kickboards, loft eaves, wardrobes, and any wall that feels cold and damp. A pro can repair the source, then clean with safe methods and establish dry-out targets.
Increased Bills
Scan water bills every month. Sudden increases usually indicate a concealed leak. A sluggish fill on a toilet or a pinhole on a pipe wastes litres. Gas bills rise too as you heat water that never makes it to the tap or the boiler works for longer to compensate for loss.
Run simple sums. If a leak wastes 10 litres per hour, that is 240 litres a day. Over a month, you’re paying for water and power you didn’t even use. Compare three months' bills to see if you are noticing a trend and justify a service call now. The tiny adjustment and brief downtime are better than expensive waste later. Insurers can increase premiums or refuse claims if they can demonstrate you neglected known problems.
Conclusion
Frozen pipes require cool heads and swift action. Small signs tell a clear story: slow taps, odd smells, damp walls. Early checks save money and worry. Quick heat, gentle flow, and a clear plan keep risk low. Major leaks, burn marks or popping sounds indicate it is time to get a professional involved. Nothing wrong with that. Just one visit is all it takes to stop damp, warped flooring and overpriced bills.
To take heed of every cold snap, take note of weak points. Lag pipes, seal gaps, set safe heat and test shut-off valves. A small kit helps: towels, a torch, a hair dryer, tape, and a bucket. Safer home. Smaller bills. No more faffing about this winter.
So when do I call in the pros? Get in touch for a quick chat.